
The Alta Via 1 hike is an epic long-distance alpine trek we did a couple years ago. It goes through the spectacular Italian Dolomites of the amazing South Tyrol region of northern Italy. Trekkers start out from stunning Lago di Braies (Pragser Wildsee) and spend 8-11 days passing through incredible jagged mountains, dramatic gorges and breathtaking valleys.
There are actually 6 different Alta Vias (High Routes) in Italy, each of which has its own character and highlights. Alta Via 1 is certainly the most popular, partially because it has better infrastructure and partially because many of the others involve traversing some serious “Via Ferrata” routes. These “iron roads” involve assisted climbing apparatuses such as ladders, chains, cables and rungs, some of which hikers/climbers need to clip into.

Our site includes affiliate links to products we recommend. If you use one to make a purchase, we earn a small commission at no extra cost to you. Thanks for your support!
There are a handful of via ferrata sections on the Alta Via 1 but they are pretty tame in comparison, don’t require any special equipment and other than a couple of short, easy sections between Rifugio Tissi and Rifugio Carestiato, they can be avoided via alternate routes if necessary.
Of course, the Alta Vias are more than just a series of beautiful hiking trails. Their history is alternately fascinating and horrifying, dating back to many deadly battles in World War I. During this period the Via Ferrata were put in place to aid troop movement, and some of the more unique features were built, such as the Lagazuoi tunnels and the trenches around Cinque Torri.

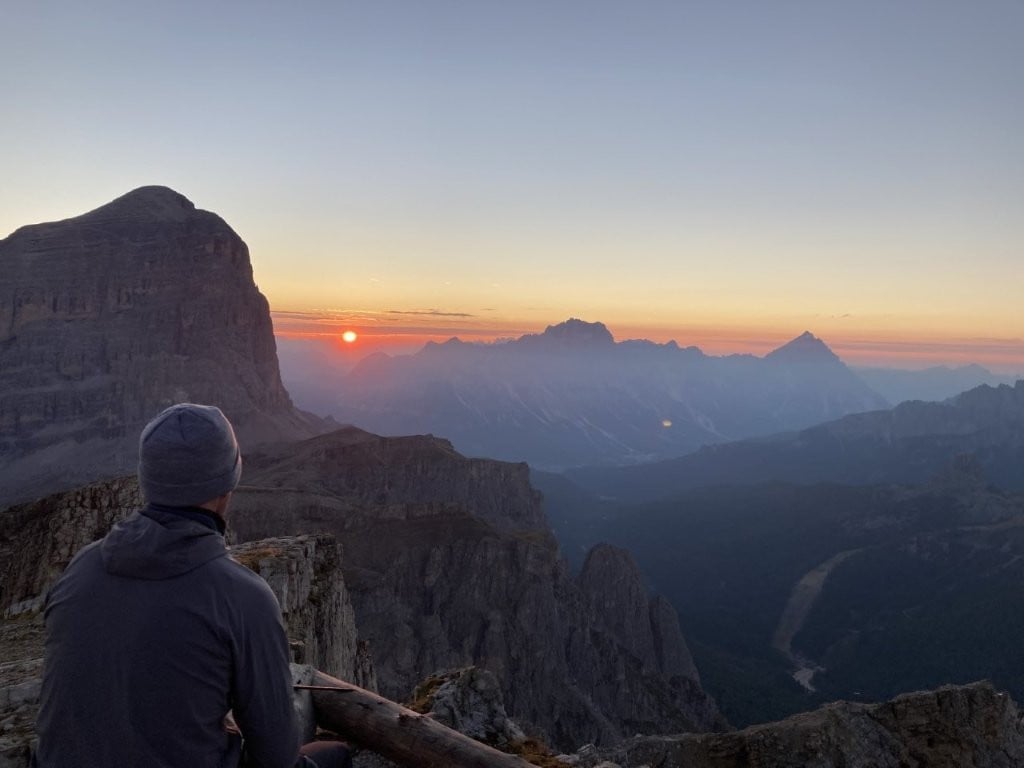
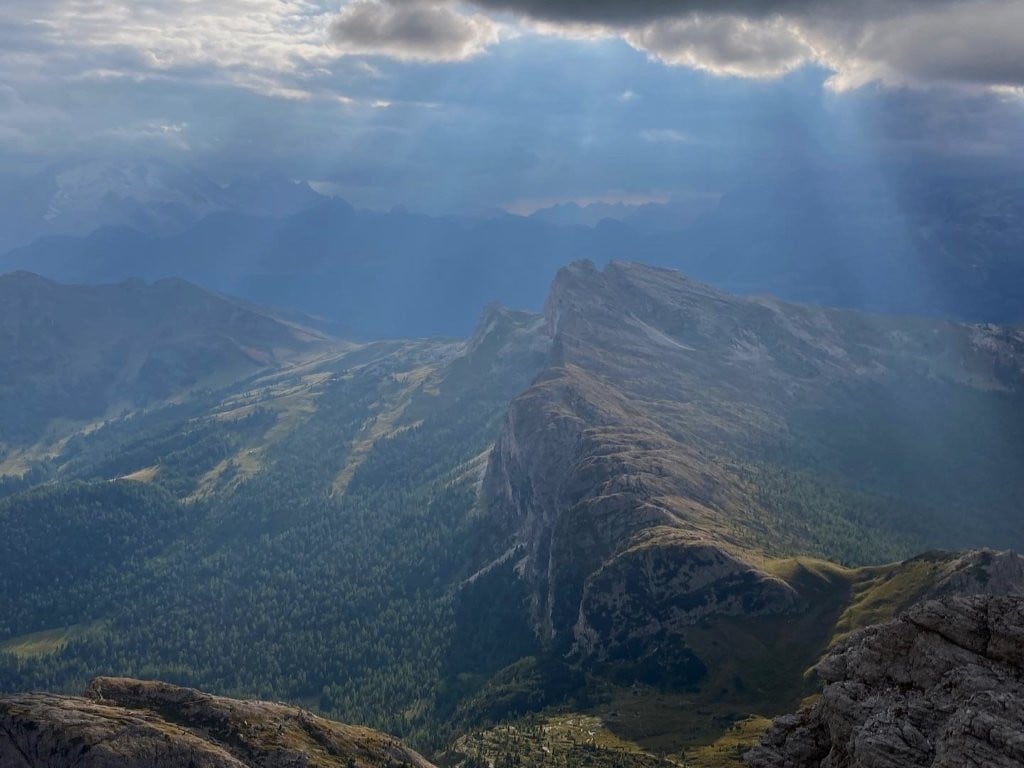
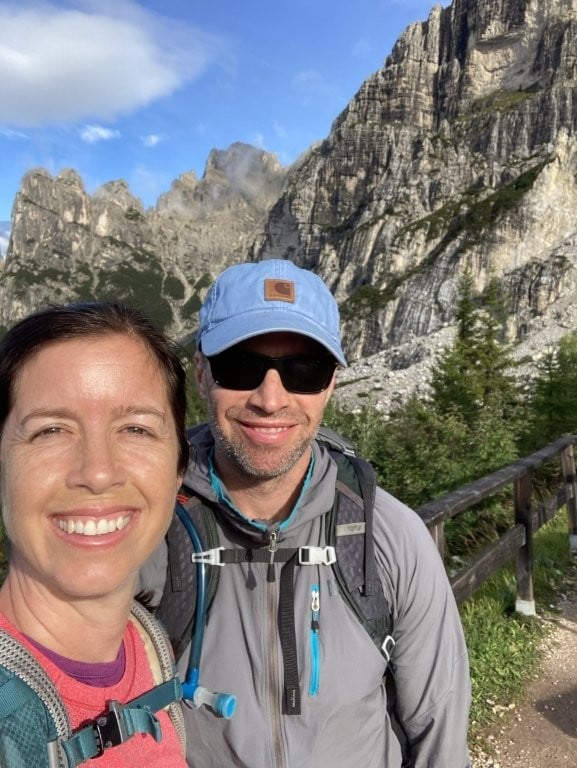
One of the most unique features of the Alta Via 1 is the “enrosadira” (alpenglow), the stunning phenomenon that occurs when the already beautiful peaks of the Alta Via Dolomites glow pink at sunrise and sunset. I have to say, it is almost worth doing this trek just to experience that twice a day (although our sunrises were almost always better than out sunsets thanks to the late day clouds).
Bottom line, this mountainous region of Northern Italy is incredibly beautiful and when it comes to enjoying the Dolomites the Alta Via 1 is one of the best ways to experience them.
You might also like: The Best Long-Distance Hikes in Europe
Alta Via 1 Details
Technically you can hike the Alta Via 1 in either direction (although that is still no reason to call it the Via Alta 1) but the vast majority go from north to south as this direction involves less elevation gain (but more loss).
Start: Lago di Braies
Finish: La Pissa bus stop (Agordo-Belluno line)
Duration: 8-11 days
Distance: 120 kilometres (75 miles)
Elevation Gain/Loss: 6,700 metres (22,000 feet) / 7,700 metres (25,200 feet)
Highest Point: 2,778m (Piccolo Lagazuoi)
Is the Alta Via 1 Hard?
Yes, but compared to some of the other long distance hikes in the Alps it is relatively mild. Most people hike the Alta Via 1 in 10 or 11 days. It is certainly possible to put in longer days and cut the time down to a week or so, while some people take their time or add in optional day hikes and complete the route in two weeks.
Outside of using the obvious statistics for distance and elevation gain and loss, we can only compare it to the other treks we’ve done personally. The Tour du Mont Blanc is probably the most comparable, as both involve multiple high passes separated by deep, scenic valleys.

While the TMB technically requires more climbing and descending, we found the trails on the TMB much smoother and easier to navigate. Many of the Alta Via trails are rough, rocky and even involve some clambering. Overall, the Alta Via was probably more difficult for us. And if you have a problem with heights or agility on rough terrain it will be a serious challenge.
When to Go
July to mid-September is the best time to hike the Alta Via 1. The snow is usually gone by late June and, if all goes well, stays away until late September. The closer you get to either end the greater the chance you will have to deal with some difficult conditions.

Even the summer has its dangers, though, as afternoon thunderstorms are common in July and August. Between the heat and the potential for storms it is usually a good idea to get an early start in mid-summer. Early September tends to be the perfect time, often falling right in between the two extremes.
Planning Resources and Info
We have tried to provide as much detail as possible in this Alta Via 1 guide to help you plan your hike.
While on the trail we used the excellent Cicerone guidebook, Trekking in the Dolomites: Alta Via 1 and 2 by Gillian Price. We purchased the ebook version so that we didn’t have to add any extra weight to our packs.
Many people recommend a set of Tabacco maps although we opted to stick with our online resources. We downloaded individual AllTrails and Wikiloc routes in advance so they could be used even when we didn’t have cell service.
As for cell service, we had it the majority of the hike, especially when we were up higher. However, you can’t count on having it the whole time. Most rifugios now offer wifi (of varying speed and reliability) and charging points.
In general, though, we never travel with a data package on our phones now. Local SIM cards are sometimes a bit cheaper but eSims are usually far more convenient. After using several different ones, we have found that Nomad eSims generally have the best coverage and prices for most of our trips. You can just buy an eSIM online, get a QR code by email and you’re good to go.
Money: Some of the rifugios feature quite modern setups and easily accept credit cards but some only take cash so be prepared for either. In some cases, their wifi simply can’t be counted on to promise you can pay with a card.
Wise is by far the best international multicurrency bank account we’ve found. We can now send and receive money in half a dozen different currencies, convert to dozens more with no exchange premium and pay or withdraw local currencies. Highly recommended.
Language: Italian / German / English. At least a little English is spoken in all the rifugios (which usually far exceeded my basic German and Italian phrases). However, people typically appreciate it if you can communicate with at least a little bit of German or Italian. Plus, there is no guarantee any of the people you meet along the way will speak English so they could come in handy (if you get lost for example).
There are no permits required to hike the Alta Via 1.
Some of huts are part of the CAI (Club Alpino Italy) and if you have a membership you can get discounts. Non-residents can purchase a membership by contacting one of the Italian branches. We did not buy them and information on the exact price was hard to come by but most people seemed to suggest they would be €50-60 per person.
We probably would have saved around that same amount with a membership so decided it was a wash. But if you are targeting exclusively CAI huts or plan to stay in more huts in the future you may want to look into it.
Trail Conditions
The trail is generally in immaculate condition and is usually very well marked with trail numbers and/or red/white paint splotches (but not always, make sure you are also using a GPS or map). The weird thing is it is marked as a combination of smaller trails and it isn’t always clear which one to use.
Often the listed destinations changed at every post. So it was necessary to know all the passes, Rifugios and other notable points on your route for the day.
In some places you’ll find a triangle with a “1” in the middle but those were sporadic and often there were small Alta Via 1 signs but they tended to be at junctions and didn’t point in any particular direction. So make sure to use your guidebook and online maps.

Of course, no amount of trail maintenance can help you up those steep slopes or down those knee-crushing descents. As we mentioned earlier, you will face some basic scrambling at times, as well as some ladders and cables to help you through the tricky sections but nothing that would be classified as technical.
Alta Via 1 Route
Most people complete the Alta Via 1 hiking in 10 days, give or take a day. The Cicerone guidebook outlines an 11-day itinerary but that involves some pretty short days at the end. Personal experience has taught us that we are much happier to linger early in a trek and are more likely willing to put in longer days at the end.
Unfortunately, the two days we spent doing the via ferrata out of Nuvalau and climbing up and over Forcella D’Arcia on Mount Pelmo messed with one of my knees. After that I was finding it difficult to go downhill (at least difficult to walk normally, my carefully designed limp allowed me to make progress but was quickly causing new problems in many other parts of my body).
With that in mind, we opted to exit the trek on Day 9 after staying at Rifugio Carestiato so we could avoid the additional 2,600 metres of descent we would have faced had we continued on.
Of course, with 30 different rifugios spread out along the Alta Via 1 route, there are many different ways to plan your stages. Speed-hikers or those with very limited time can technically complete the entire route in 5 or 6 days, although that would be very strenuous and sounds like almost no fun at all, in my personal opinion.

Alta Via 1 Itinerary
There are many ways to mix and match the stages to customize your route but we’ll start with the standard Alta Via 1 itinerary as outlined in the Cicerone guidebook:
11-Day Itinerary
- Rifugio Biella / Rifugio Sennes
- Rifugio Fanes / Rifugio Lavarella
- Rifugio Lagazuoi
- Rifugio Averau / Rifugio Nuvolau
- Rifugio Citta di Fiume
- Rifugio Coldai
- Rifugio Vazzoler
- Rifugio Carestiato / Rifugio Sebastiano / Rifugio Passo Duran C Tome
- Rifugio Pramperet
- Rifugio Pian de Fontana
- La Pissa
We made a few changes in our choice of huts (based on recommendations) and to include the spectacular variant to Rifugio Venezia.
Then, because Rifugio Pian de Fontana was fully booked the night we wanted to be there, we planned to hike all the way out to La Pissa in a single day rather than back up our night there and have 2 short days near the end (although neither of those things happened in the end).
The simplest way to switch your itinerary from 10 days to 9 would be to skip the Rifugio Venezia variant, going straight to Rifugio Tissi on day 6.

10-Day Itinerary
- Rifugio Biella / Rifugio Sennes
- Rifugio Fanes / Rifugio Lavarella
- Rifugio Lagazuoi
- Rifugio Averau / Rifugio Nuvolau
- Rifugio Citta di Fiume
- Rifugio Venezia
- Rifugio Tissi
- Rifugio Carestiato / Rifugio Sebastiano / Rifugio Passo Duran C Tome
- Rifugio Pramperet
- La Pissa bus stop
To shorten up your Alta Via 1 itinerary to 8 days you’ll probably want to reach Rifugio Lagazuoi in 2 days instead of 3. Then if you still want to do the variant to Rifugio Venezia you’ll have a long 4th day from Rifugio Averau and long 7th day to Rifugio Pian de Fontana. Or you could push your long day back to the final day, staying at Rifugio Pramperet and hiking all the way out from there.

8-Day Itinerary
- Rifugio Pederu
- Rifugio Lagazuoi
- Rifugio Averau / Rifugio Nuvolau
- Rifugio Venezia
- Rifugio Tissi
- Rifugio Carestiato / Rifugio Sebastiano / Rifugio Passo Duran C Tome
- Rifugio Pian de Fontana
- La Pissa
Tre Cime di Lavaredo Add-On
Tre Cime (Three Chimneys) di Lavaredo is one of the most famous range of peaks in the entire Alps. There are several great hikes around these 3 sharp, distinctive mountains, making it one of the most popular day hiking areas in the Dolomites.
We visited on a day trip a couple of days before starting the Alta Via 1, using it as a warmup hike and to practice our photo-taking fingers.

However, it only adds a day or two to include the amazing “cime” in your Alta Via route. Starting from Rifugio Auronzo (located right below the three chimneys) you can hike around to Rifugio Locatelli then continue down the valley, enjoying fantastic scenery throughout a rather long day to Rifugio Prato Piazza.
From there you cross more incredible terrain until eventually choosing between going down to Lago di Braies or directly across to Rifugio Biella. Some American friends we met later on the Alta Via took this route and went down to spend a night at the illustrious Hotel Lago di Braies, ultimately adding 2 extra days to their total itinerary.
Guided and Self-Guided Tours
Of course, lots of hikers are really just interested in the trekking and scenery and all that good stuff and they could really do without all the planning. If that describes you, maybe it makes sense to have a professional trekking company handle that end of things so you can just show up and walk.
Alpenventures Unguided is an excellent company that organizes self-guided tours all over the Alps. They offer a variety of itineraries with different lengths and comfort levels. This is definitely the way to go if you are looking to do some epic trekking but don’t want to spend a lot of time figuring out routes and booking huts.
Or if you are interested in trying some of the via ferrata in the Dolomites and would like to hire a local guide to show you the way and provide history and context, Explore-Share offers a great way to experience the routes safely with a certified guide.
Alta Via 1 Map
Click the star to save this map to your Google Maps – then find it under Saved/Maps (mobile) or Your Places/Maps (desktop)
Alta Via 1 Stages
Here is a day-by-day breakdown of our final itinerary with notes and info for each stage:
Stage 1: Lago di Braies to Rifugio Biella
A picturesque starting point to the trek, you start off with an easy, flat (and usually busy) walk along Lago di Braies.
You might also like: The Most Beautiful Lakes in the World

For some reason, there are a lot of cows that hang out at the far end of the lake that are a huge hit with amateur photographers. As North Americans we are always mystified by just how excited Europeans get when it comes to taking photos of cows…
Nonetheless, we stopped there for lunch, enjoying the spectacle of some thwarted humping from one of the young bulls, then continued on around the lake to the turnoff to head up the valley.
This long slog up a rocky, landslide area is known as “il forno” (the oven) and, yes, there is a reason for that. You will sweat. Well, you will probably always be sweating on the Alta Via 1, but maybe a bit more than normal on this section. The views back down the valley to the lake are amazing, though. And once you reach the ridge before Biella the entire landscape opens up in dramatic fashion.

It takes about 20 min to get to the end of the lake, another hour up to the first plateau, then about 1.5 hours to Rifugio Biella, almost all uphill.
If you are impressed by Lago di Braies, you might also want to check out our detailed Guide to Lac Blanc: Chamonix’s Stunning Alpine Lake
Stage 1 Variant: Croda del Becco
If you’re feeling energetic on the first stage you can take on this 2-hour return climb to the awesome viewpoint looking back over Lago di Braies (and a bunch of mountains, of course). The turnoff is only 10 minutes before Rifugio Biella so you may want to head there first and leave your main backpack behind.
Or you can probably leave your pack next to the trail – long distance trekkers generally aren’t known for petty theft. If for no other reason than most people already have too much of their own stuff to carry and don’t want to add your weight as well.
Stage 2: Rifugio Biella to Rifugio Lavarella
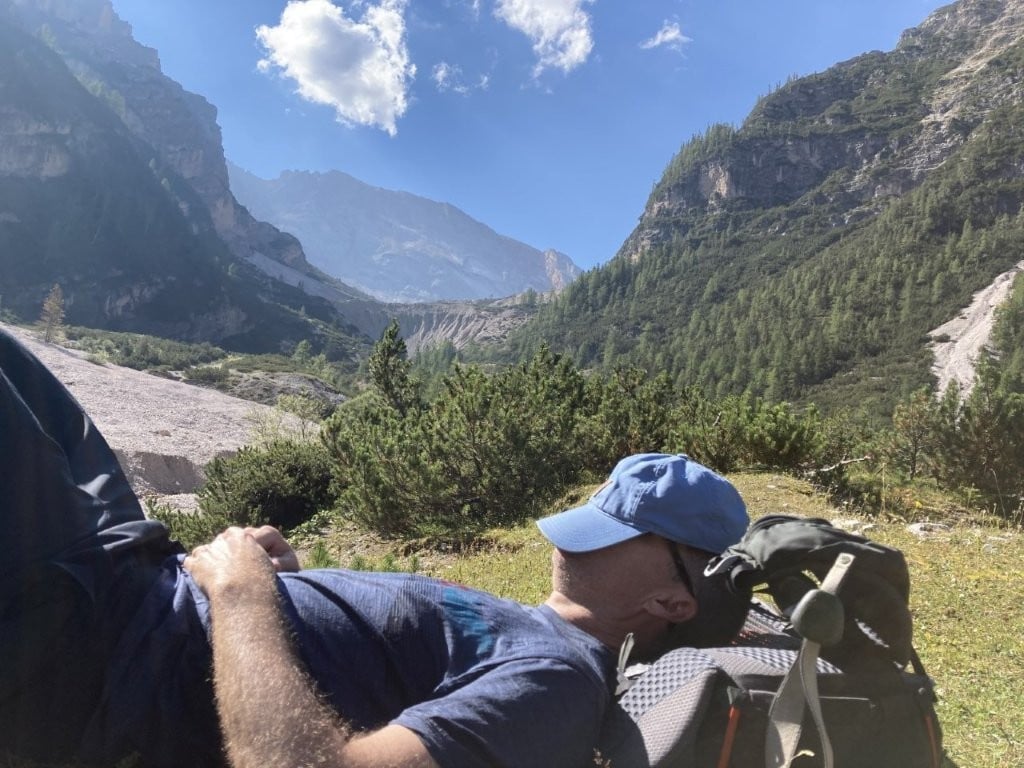
From Biella you follow some nice, rolling hills through gorgeous landscapes until you reach the edge of a valley, then head straight downhill all the way to Rifugio Pederu (2.5 hrs). There are some great views from the top but once you start down a lot of the time is spent switchbacking on forest paths and a dull dirt road.

Meanwhile, we were shocked at how many day hikers passed us on their way up from Pederu, trudging dejectedly with almost nothing to see. Including a 3-legged dog who clearly didn’t think much of this particular outing.
After we completed the knee-busting descent we laid in the grass for nearly an hour, simply enjoying the calm, sunny day and watching the parade of day hikers going past.
Once we managed to get ourselves moving again it was about 2 more hours to Rifugio Lavarella (or Rifugio Fanes – they are within sight of each other) through some typically amazing scenery.

Stage 3: Rifugio Lavarella to Rifugio Lagazuoi
There is a pretty steep (but short) initial climb out of the valley before the hills clear out and your feet, knees and lungs all get to enjoy one of the few prolonged flat stretches of the entire Alta Via 1. Soak it all in until you reach a decision point about 1.5 hrs in.

Here, you can either stay on trail #11 and follow it down and around the peaks looming to the southeast or turn left on #20B and start climbing. And climbing. And climbing. Until the climbing stops at Forcella del Lago and suddenly you find yourself staring down a narrow, rocky chute to Lago di Lagazuoi (and Rifugio Lagazuoi atop a high hill the far distance).
From this vantage point it looks like a practically vertical descent but, rest assured, the path is actually quite manageable now that well-groomed switchbacks were built a few years back. Before that it must have been death-defying in the truest sense of the word.
Now anyone who can make it up that far should have no problem making it back down – unless you have a problem with heights, in which case you probably want to opt for the longer detour.

Once you reach the lake you’ll start seeing a lot of day hikers and climbers coming down from Rifugio Lagazuoi, which is one of the best (and most popular) viewpoints in Italy and is accessible by cable car.
Unfortunately, there is no cable car on this side so you’ll definitely have to struggle up the long, rocky climb to the rifugio on your own (but the views back to the lake and Forcella del Lago alone are worth the effort).

Apparently, many of the rocky ruins you pass on the way up are remnants of the fierce fighting that took place here in WW1 but although the history itself is compelling, most of the “ruins” don’t look like much of anything.
Once you reach the last (even steeper slope) before the rifugio you’ll find the first of the famous WW1 tunnels and soon there are great views in literally every direction (as opposed to just one or two on the way up, so spoiled).
Rifugio Lagazuoi may be popular and hectic and practically overrun in the middle of the day but it truly is one of Europe’s incredible panoramic viewpoints.

After the final cable car heads back down around 5 pm the place takes on a whole different feel. Be sure to add on the short jaunt up to Piccolo Lagazuoi, the even higher viewpoint featuring a large cross. And on a clear day (which we had), the sunrise is truly epic.

The Lagazuoi Tunnels lead all the way down to Passo Falzarego from just below the cable car. This can be used as your route down in Stage 4 (see below) or if you want to stick with the mountain trails you might want to explore them a bit after you arrive.
Check out our complete guide to Rifugio Lagazuoi
Stage 4: Rifugio Lagazuoi to Rifugio Averau
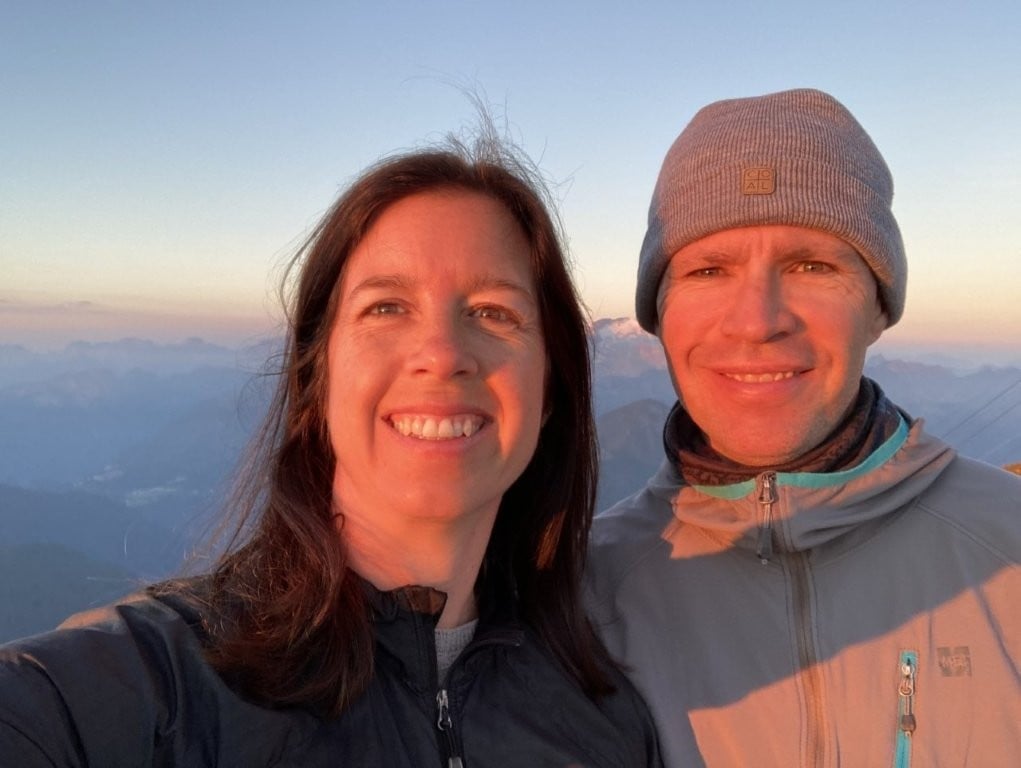
If you are ever going to drag yourself out of bed for sunrise (not an easy feat for me), Lagazuoi is the place to do it. On a clear morning (which is most of the time) the entire region slowly opens up to you in breathtaking fashion.

Tip: Almost everyone stays on the rifugio terrace but either Piccolo Lagazuoi or one of the benches just below the cable car are arguably better spots. I stumbled across some terrific shots from the cable car platform of Laynni soaking it all in on the lower bench.

After that, make sure you get going no later than 8:30 am to avoid the first batch arriving by cable car at 9 am. We puttered around too long and when we finally got going right at 9 we ended up in a queue of eager climbers, early rising photographers and somewhat confused families.
That was the first of several odd decisions we made during Stage 4 that makes it hard to provide good recommendations (other than “do as we say, not as we do”). We skipped the tunnels (see below) because it was another beautiful day and we didn’t want to spend part of it in a dark tunnel.
The normal route goes all the way around via Rifugio Dibona but we hadn’t heard much of interest about that section so we decided to cut down on the far side of Forcella Col dei Bos. It was a fantastic, gradual downhill walk to that point. Then we followed a small dirt road down toward the highway – so far, so good.

Until we reached a T-intersection where our app told us we had to detour several kilometres either right or left (didn’t really matter which) even though our goal (the path up to Cinque Torri) was a mere 500 metres directly ahead of us (and steeply down, of course).
And there just happened to be a wide, rocky washout pointing in just such a direction – what luck!
Funny that none of the maps, apps or guidebooks mentions this option – I guess we’re just a little more clever than most. So off we went, picking our way carefully down the rocky landslide area feeling pretty pleased with our shortcut. Until it started getting narrower. And narrower. And steeper. And overgrown.
To the point we actually found ourselves crawling under shrubs, climbing down steep ravines and sliding down slippery patches of mud. At this point, as you might imagine, we were no longer feeling quite so smug. We were, however, completely covered in pine needles, so there’s that (in fact, I’m still finding stray needles hidden in the crevices of my backpack).
We did eventually make it to the highway. On a very direct route, I might add. Filthy, completely exhausted and only about 15 minutes sooner than if we had jauntily walked the easy way around, but technically successful.
Now, just to be clear, you should not attempt this and, luckily, you don’t have to. Following the slightly more circuitous route in either direction will mean a gentle downhill walk and easy navigation. Sometimes shortcuts aren’t worth it, who knew?
Of course, at this point the long climb up to Cinque Torri (5 Towers) seemed truly insurmountable so it took us all of about 3 seconds to decide to take the cable car up to neighbouring Rifugio Scoiatolli.
In the end, the cable car was a wise decision (maybe our only one of the day), as that left us with enough energy to properly explore the fascinating and wildly photogenic Cinque Torri rock formations, eventually completing a full circumnavigation before heading up the final slope to Rifugio Averau.

Of course, a couple of unnecessary stops meant we got caught in the rain just minutes shy of the shelter, capping off our most bumbling of Alta Via days. The beer at the end tasted even better, though (once we had finished “spot washing” our pants).
The views up there are once again stupendous, from Averau, Nuvolau (30 min up the hill) or even just the slope. If you still have energy left after arriving we would recommend following the faint path back southeast that goes up along the flank of Mount Averau.
You can walk for about 10-15 minutes to reach an extraordinary viewpoint overlooking Cinque Torri, Rifugio Lagazuoi and even Forcella del Lago.

Stage 4 Variant: Lagazuoui Tunnels
These WW1 tunnels are truly a marvel of engineering, perseverance and shocking determination to sneak up and kill other people. They make for a pretty fascinating visit for those who don’t mind steep, dark paths in relatively tight spaces. If that sounds feasible for you, or if the weather outside isn’t great, you might want to try the variant through these wartime tunnels.
This route is technically shorter but could end up taking a similar amount of time if you make a lot of stops along the way for photos or to explore. It can be a bit slippery, you’ll want a headlamp and maybe gloves for the cables but we’re told the whole thing is a pretty fun adventure.
It is also possible to pay to send your backpack down to Passo Falzarego by cable car, making it easier to navigate the tunnels and climbs.
Stage 5: Rifugio Averau to Rifugio Citta di Fiume
There are two routes to choose from out of Averau (or Nuvolau). The most common is the low route down around Nuvolau that reaches Passo Giau in about 1.5 hours. The other tackles the via ferrata over the cliff behind Rifugio Nuvolau.

This route is technically shorter but will take at least an hour longer (2.5 hr to Passo Giau) because much of the time you are, you know, climbing. Or just hanging on for dear life. Whichever seems most practical at the time. But, oh man, the scenery! It was pretty amazing.
Some disclaimers, though. While I wouldn’t call it “dangerous” per se – as long as you take your time and are extremely careful – it is pretty clear that a fall along this route would be very bad. Don’t try it if you have any problems with heights. Don’t attempt it with a large backpack – ours were relatively small (6-8 kg) and still they threw off our balance a bit.
And definitely don’t try it in bad weather, or if the rocks are still wet from a previous rain (luckily it is on the sunny side of the mountain so even though it rained the night before it was basically dry by the time we got there).

You might even want to avoid it if you don’t like the feeling of “nut flies”, which is what the American father and son who were considering joining us called that shocking, sinking feeling that suddenly occurs in a man’s testicles when he encounters a steep drop-off.
This was enough to deter them and, while it’s not for me to say whether or not they made the right decision, I am enthusiastically adding the term “nut flies” to my everyday vocabulary, to be used as often as I can squeeze it into casual conversation.
Such as “the views from that balcony are nice, except for my serious case of nut flies”. Or “sure, horseflies are annoying, but they’re nothing compared to my nut flies”. Obviously it’s still a work in progress.

Anyway, by choosing this route we also may have also inadvertently altered our entire plan for the rest of the Alta Via 1. Although I didn’t feel anything at the time, the next morning I woke up to an aching, gimpy knee that must have been the result of the steep downward climbs and ridiculous contortions I had subjected it to on the via ferrata.

Of course, the pain was only a factor when going down. Like on stairs. Or presumably, most of the 5,000 metres of mountain descent that still lay ahead. Well done, again, Dean.
Whichever route you choose it ends up being a pretty long day, although with a lot of amazing scenery along the way.
From Passo Giau, where the two routes merge, it is about an hour to Forcella Giau (great views), then another hour to Forcella Ambrizolla (great views), about 30 min down a rough, rocky path (great views) before finishing with an easy, downhill hour along a dirt road to Citta di Fiume (what do you know, more great views).

Stage 6: Rifugio Citta di Fiume to Rifugio Venezia via Monte Pelmo
This variant via Rifugio Venezia passes sort of “through” magnificent Monte Pelmo. It is difficult, exhausting and adds a few hours to the overall hiking time of your trek but the scenery is pretty incredible. If you have the time and energy and don’t have a problem with steep slopes or heights you could consider going this way. Rifugios Palafavera and Monte Pelmo are also found along this route.
For us, this was basically doubling down after a pretty tricky day of ferratas the previous day. We had some doubts when I woke up with a sore knee that made it difficult to get down the stairs but, in my typical fashion, after flexing it a few times, walking in a small circle or two and concluding that “it wasn’t too bad”, we decided to give it a shot.
The first 30 minutes were more or less flat (by Alta Via standards, anyway), then the trail took a sharp left up into a huge, very steep washout that appeared to be heading toward a very high pass in the very far distance. On we went.
Well, it got progressively steeper and much slipperier (mostly loose shale and gravel) to the point we both wondered aloud “how are we going to get down if the other side is like this?” We didn’t stop or turn around, of course, just kept nervously climbing. My knee wasn’t bothering me at all at this point but I could tell that would change significantly once we started descending.

Well, after 1.5 hours to the first (and only) flat area – a nice, grassy plateau with ridiculous views – it was onward and upward again, this time into a massive rocky bowl where we could see the trail all the way to the pass, except for right at the very end, where it just seemed to… disappear. Gulp, as they say in the comic books.

As we got closer, though, we eventually could make out just the faintest path through the soft, loose gravel so, very slowly, after about 45 minutes we made it up to the pass. Success! Until we looked over the other side, to see rather unpleasantly similar terrain. A few more rocks, though, and maybe a touch less loose gravel, so I think the direction we went was marginally easier. Nonetheless…

It was a long slog down, with me trying my best to only use one leg and keep the other perfectly straight at all times, and Laynni’s lifelong hatred of steep, slippery downhills. Around 2 hours to get down in total, including a couple more ferrata sections where we needed to use cables to navigate some tricky corners and sheer ledges.
Bottom line: not our favourite day, although the views were tough to beat. Then, to add insult to injury, after watching Rifugio Venezia come slowly closer for the past hour, watching a large group drinking in the warm sun, just relaxing and enjoying life, as soon as we arrived and ordered our celebratory beer the clouds rolled in and the wind picked up and we didn’t even get to really enjoy that part.
Sitting there freezing with an ice pack on my knee. Mountains, I tell ya.
Stage 7: Rifugio Venezia to Rifugio Tissi
After giving some serious thought to quitting to save my ailing knee any further aggravation (not to mention trying to figure out how I was going to clumsily limp for 4 more days) we once again decided to press on. It felt so good walking around the hut!
Then 50 metres onto the trail I felt the first twinge and it was back to awkwardly shuffling along – both poles forward in unison, long step left, short step right, repeat. It sucked, but at least I looked forward to the uphill sections far more than usual (normally the answer is “not at all”) – on those it was like nothing had ever happened. Unfortunately, only the first 30 minutes was gradually uphill, then we spent the next 2 hours heading steeply down to Palafavera (campground/rifugio/ski resort). Ugh.

Anyway, from there it was about 45 minutes up a dull gravel road to the top of the ski hills, then another hour steeply up to the famous and magnificently located Rifugio Coldai.
Then some of the best scenery of the trek on the 2-hour section from Coldai to Rifugio Tissi, perched up at the very point of a dramatic outcropping. Not the clearest skies but beautiful Lago Coldai, plus some very cool clouds with iconic Mount Civetta directly beside us the whole time, and seriously looming right over the rifugio. A pretty amazing spot.

Stage 8: Rifugio Tissi to Rifugio Carestiato
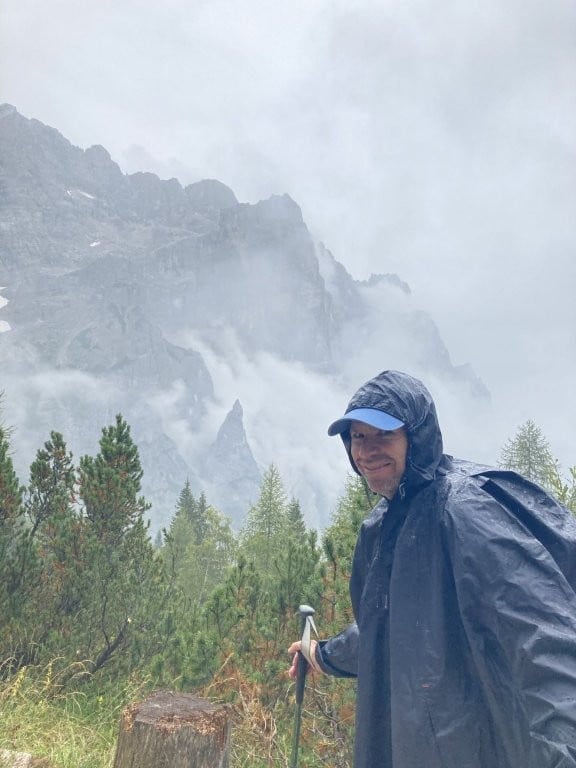
Our first and only day hiking in the rain. The scenery looked unbelievable and incredibly varied, at least whenever the clouds parted briefly, so it was a bit of a shame we didn’t see more of it. We started in cloud, which soon became drizzle, then eventually actual rain and, as usual, we waited way too long to put our rain pants on.
I’ll never understand why we carry all this great rain gear with us and then are always so reluctant to actually use it. I guess it kinda feel like admitting that it is raining and going to continue to rain.

However, by the time we made it to Rifugio Carestiato at the end of a long, dark, slow, wet day (7.5 hrs with breaks, including the questionable one under a perfect stone overhang that had very obviously been used by a lot of women as a pee spot) we were pretty thrilled to be fully geared up (poncho, pants, waterproof gloves and shoes), especially considering the state of some of the other hikers.
An American guy we got to know spent the day regretting his decision to bring his “Ecuador poncho” – a transparent, short-sleeved $1 poncho. Our Belgian roommates, who would have been camping except that everything they owned was completely soaked, were lucky enough to score the other 2 beds in our room. Their roll of toilet paper, however, looked like a massive loaf of white bread.
There was a German couple trying to get to the next set of huts at Passo Duran but had to turn back because a torrent of water was rushing across the road, making it completely impassable.
A pretty bleak day, all around. Except for each time the clouds parted and showed the incredible surrounding scenery. But once we were all dry and drinking it was a pretty festive atmosphere in the hut and, to be fair, when you only get one day of rain hiking in the mountains in September, you logically have to call that a big win.
Stage 9: Rifugio Carestiato to Agordo
This was to be our final day and we set out with mixed feelings. On the one hand, it was exciting to think about getting back to civilization, away from endless mountain climbs and descents, not to mention the chance to rest my knee (which was noticeably better but far from great).
On the other hand, the scenery had been fantastic every step of the way, some of the best we’ve ever experienced while hiking. Cutting that short by even a day or two was a bit disappointing.
Nonetheless, it was the right choice under the circumstances and it was a pretty pleasant walk (one final long descent) with much better weather along a rocky path for the first hour, then along a quiet farm road (there is an off-road option as well) with nice views over Agordo and the valley (3 hrs total).

After a brief – but rather typical – urination mishap which involved me sneaking off into a shrubbery full of stinging nettles (just one more for the story board), we eventually boarded a bus for Belluno where the general mood was jovial right from Agordo, where about 7 of us got on, and after La Pissa, where we picked up about 10 more hikers, most of which we had met at different points earlier in the trek.
Then we all got off in Belluno and it was like a bathroom full of cockroaches when the light comes on – scatter! I swear, every long-distance trek we’ve ever done ends in a weird, awkward or anticlimactic way. So that part felt familiar, anyway.
How Much Does the Alta Via 1 Cost?
Expect to spend about €100 per person per day to hike the Alta Via 1, on average, if you are staying in dorm beds with half-board, buying packed lunches and maybe a couple drinks every day.
If you opt for private rooms whenever possible and get a little frisky with the drinks, that daily budget can quickly increase to €140 per day.
The rifugios varied considerably in both quality and price so it is a bit tricky to generalize but, on average, you should expect to pay €50-80 per person for a dorm bed with half-board. The smaller the room, the higher the prices got.
In some rifugios it was just €10-20 more to stay in a smaller dorm or even a private double room but others charge €100-150 per person half-board for this added privacy. A few places include hot showers, others charge for the privilege (€2-5) and some just suggest you try to sweat less.
If you opt pay for your bed and food separately, breakfast was typically €8-12 for anything from a basic continental (coffee, bread, butter, jam) to a filling buffet (coffee, bread, cereal, meat, cheese, etc.). For lunch, you can either purchase a packed lunch at your rifugio (€8-12 for a sandwich, fruit and maybe something sweet) or stop at a hut along the way and spend €10-15 on a hot meal.
Dinners were almost always excellent and prices varied considerably (€12-25). Throw in a few coffees (€1-3), glasses of wine (€2) or pints of beer (€5) and it all adds up pretty quick. Other than prices, our only complaint would be that the packed lunches were occasionally basic and bland.
Having a few small snacks on hand for emergencies (and/or cravings) is never a bad idea. We always carry some trail mix and a Snickers bar or two, just in case.
Where to Stay: Alta Via 1 Rifugios
The many outstanding Alta Via 1 rifugios are a big reason why it is such a popular long-distance trek. Almost all feature incredibly scenic locations to go with comfortable accommodations, food ranging from decent to superb and friendly hospitality. But if you haven’t experienced hut-to-hut hiking in the mountains before there a few things to know.
You can’t wear your hiking shoes or boots inside the mountain huts so you should bring along some sneakers/slippers/flip-flops/crocs to wear in the rifugio. Many places provide them but you can’t count always count on that.

You also need to have a sleep sack to use under the heavier blankets provided and, while some provide towels, most don’t so you should always bring one of those as well (unless you are planning to go au natural the whole way).
While some of the Alta Via 1 rifugios are fairly basic, offering only dorm beds and rustic common areas, others boast modern facilities, including hot showers and comfortable private rooms.
You will need to analyze your options carefully, considering your preferred itinerary, desired comfort level, your budget and the importance of a phenomenal view (then be ready to completely change your plans when you find out one of your chosen huts is already booked up).
The shower situation was all over the map – sometimes none, sometimes only cold water, sometimes free or pay hot showers. The more basic ones tend to be the CAI huts (Club Alpino Italiano) that are usually older and non-profit. If you are a CAI member (or a member of other alpine clubs in Europe) you can get a discount staying at these huts.
So, really, even though the huts vary in quality and price, for most people the main problem is going to be getting a bed in their desired stops. The most popular huts can book up 6-9 months in advance for high season and any of them might be full on a given night if a group or two happens to be passing through.
So as much fun as it can be to just “wing it” and enjoy the spontaneity of picking your stopping point on the go, that isn’t really a feasible option in this case. Theoretically, huts will not turn anyone away at the door but unless you are excited to spend most nights sleeping on the kitchen floor you should probably start sending out emails as soon as you have your dates locked down.
We always start by looking on Booking.com. With frequent stay discounts, thousands of reviews and free cancellation, it is very rare for us to have a bad hotel experience these days. However, only a few of the options are available on there, the rest must be reserved through a mix of online booking, email or phone.
You need to start the hut booking process early. We booked the incredible Rifugio Lagazuoi about 5 months in advance (before we were even sure we’d be going) just because we knew it was the most likely one to fill up.
Then we started making the rest of our reservations in late May for our mid-September hike and got 6 of our 8 choices (Rifugio Sennes and Rifugio Pian de Fontana were already unavailable on the dates we wanted).
Most of the huts required a deposit of €20-30 per person to hold the reservation. Sometimes we were able to pay online with a credit card while others required us to make a bank transfer. Also, every cancellation policy was different, some offering full refunds up to a certain date, some keeping up to half the total payment, so pay close attention when you are booking.
Once you have 8 or 9 huts booked, though, changing dates or cancelling is definitely going to be a nightmare so try to be as sure as possible about your dates before getting started.
In a perfect world, you would spend the night before the trek at elegant Hotel Lago di Braies, located right on the lake, as you might expect. It is the only choice at the lake and is basically mid-range for northern Italy (meaning pretty pricey). It fills up fast but would be a pretty special place to start your hike.

The following chart breaks down the hiking times to each hut (in hours from both the last hut and the start). Because the different stages involve such variable terrain and differences in uphill/downhill sections it is best to plan around the estimated hiking times rather than the number of kilometres. If the chart isn’t showing on your mobile device you should be able to click on the link below it to open it another app.
Rifugio Descriptions and Details
Now, Laynni has provided some more detailed descriptions of the rifugios we stayed in personally, as well as specific food and drink information as she is always way better at paying attention to those kinds of details than I am.
Rifugio Biella
This rifugio is one of the more basic that you will see on the Alta Via 1. It reminded us of many of the albergues on the Camino de Santiago.

There are only 4-6 person dorms. Our dorm had 2 single beds and 1 bunk bed but most of the other dorms had only bunk beds. The building is older and everything seems to creak and there is little to stop noise from neighboring rooms so ear plugs are definitely a good idea.
There are squat toilets and laundry lines with laundry pins behind the rifugio and our clothes dried quickly out there in the sun and wind.
The water is rain water and not drinkable although it is treatable. Or you can buy water for €4. There are sets of electrical outlets on each floor and there always seemed to be a spot open.
The sun shone on the terrace until late in the day and it is well worth getting up early for the sunrise with the sun on the mountain behind the rifugio.

Biella was the only rifugio that gave us fresh sheets and pillow cases including a case for the blanket and we made our own bed which was a nice touch. There is 4G cell service and if you need a stronger signal you can go to the top of the hill.
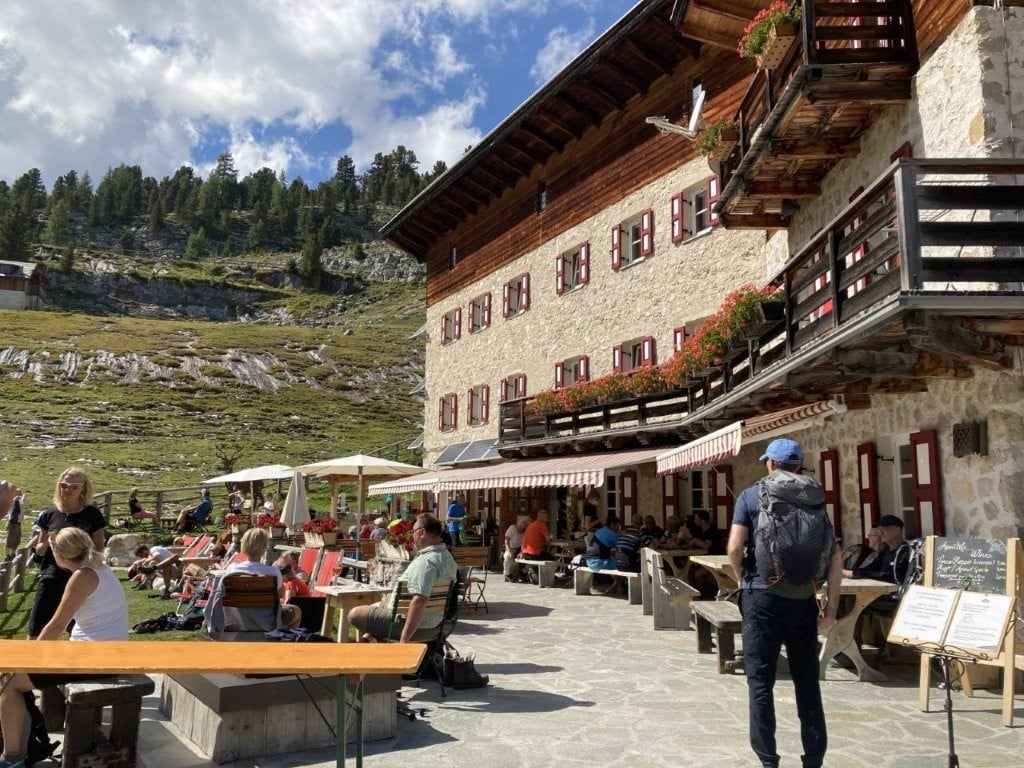
Rifugio Lavarella
Rifugio Lavarella is also very popular with day trippers and e-bikers so it was very busy when we arrived. The rifugio is very modern and new, especially compared to Biella, however, it is also more expensive.

It even has its own brewery so having a beer in the sun was very popular as well. This is the only place that we stayed at where the water was drinkable. The boot room was in the basement and even had boot dryers so your boots are warm in the morning.
We stayed in a private room with two single beds along the side of the wall and a sink in the room and lots of hooks and shelves as well as a plugin. The dorms were also well set up. There was no cell service but there was wifi in the room (although we couldn’t get it on the terrace).

There were 3 free showers each for men and women with plenty of hot water and no time limit which is unusual on the Alta Via 1. There were all-in-one soap/shampoo dispensers on the wall in the shower room. The bathrooms also had hair dryers and 4 individual toilet rooms. They provided towels in the private rooms.
We arrived early since it was a shorter day and they let us check in at 1:30 so we had plenty of time to relax and then enjoy the terrace and a few drinks. The sun was behind the mountains in the later afternoon on the terrace but still a great place to watch the cows and the cavorting fat marmots.
Rifugio Lagazuoi
This rifugio was probably the busiest of the entire trek, very full with day trippers, but it also had the best views. It is perched on the edge of a mountain cliff, has spectacular views in all directions and can be accessed by a gondola. However, it quiets down around 4 and after the last gondola it is just the people staying overnight that get to enjoy the amazing sunsets and sunrises.

We stayed in a private room as that was all that was left when we booked. As mentioned, this is a very famous rifugio without other options nearby so you will want to book this one early. The private rooms were on the second floor and had a door to a deck with views over the main terrace and mountains (which made it easy to see if the sunrise was worth getting up for).
There was a heater that we controlled during the day but was then shut off at night which wasn’t an issue as the room was plenty warm. They provided towels and warm blankets and the room had a plugin. There were 3 toilets and a shower on the second floor with hair dryers.
There are also 6-12 person dorms in the basement with bunk beds that also had heaters and blankets. There were another set of showers and toilets near the dorms. We didn’t have to pay for the shower but I think people in the dorms did.

Follow the trail along the cliff up to Piccolo Lagazuoi for views over the rifugio and the surrounding mountains. This area is very popular at sunset. At sunrise most people who got up stayed on the terrace but we think the best views were on one of the two lookouts just below the cable car.
There was good cell service (we even made a video call to Canada during sunset on the cliff) and wifi.
We also wrote a complete guide to Rifugio Lagazuoi that is worth checking out if you’re planning to add it to your itinerary.
Rifugio Averau
This is another newer rifugio with great views over the valley, mountains and Cinque Torre. It is one of 4 rifugios that are quite close together so you have a lot of choice in this area and all of them are busy with day trippers.

We were in a 10-bed dorm that had 2 of the bunks (4 beds) portioned off so it felt more like a 6 person dorm. The dorm was well organized with plugins, a light above each top bunk and included warm blankets, towels and a door to the deck.

There was a free hot shower with unlimited time but you had to push the button for water every 15 seconds. There was also a hair dryer. It started to rain just before we arrived so all these amenities were appreciated.
The boot room in the basement had boot warmers and extra public toilets, as well as a washer and dryer so you could do a load of laundry. The fee was €6 to wash and €6 to dry.
The outdoor area was a definite winner as it was a cooler afternoon after the rain and they were able to put the awning down and close it in but the walls were all plexiglass windows so it was like being outside, except warm.
Rifugio Citta di Fiume

From this part of the hike on there are older rifugios and fewer day visitors. Rifugio Città di Fiume is run by the CAI and is a smaller rifugio with 5 rooms with 4-6 person dorms. We were in a 6-person dorm with 3 bunks that would have felt very small but we were the only people in it so were able to spread out.
The room had few hooks, shelves or places to put your stuff once you unpacked. Some of the rooms had a mix of bunks and single beds and there was an outlet in each room.

There was one shower with hot water that was €3.5 for 5 minutes and two toilets and a big sink that people washed their clothes (clothes line out back).
The dining room had a heater which was nice as it was a colder afternoon with some late rain. There was decent wifi and cell service.
Rifugio Venezia
Venezia had a variety of rooms with 1-4 bunks in each. We were in a room with 3 bunks that had a decent amount of space. It was the only rifugio that didn’t automatically provide blankets but they did give us some when we asked.

The shower was €5 and there was only one toilet for women and two for men. It wasn’t a problem for us since the place wasn’t full but there could be lineups in busier times.
There were no outlets in the room and only one power bar in the dining room. The wifi was slow and we had no cell service in the rooms. However, it is definitely orth getting up in the morning for when the sun hits Mount Pelmo out behind Rifugio Venezia.
Rifugio Tissi

The rooms were mostly dorms with 4-8 people with mostly solid bunk beds. We were happy to end up in a 4-person dorm by ourselves. There were a couple private rooms as well on the main level.
There is one shower with hot water that costs €5 for 5 minutes and is down on the main floor in the room with the public toilet (squat). A large Spanish group got there before us but opted to drink first, shower later, which gave us just the opening we needed to beat the lineups. I would suggest doing the same as the queue soon grew to 6-8 people for the next hour or so. There are also two Western toilets upstairs.
There are only 3 outlets by the main stairs (and one in the bathroom which someone used but their phone was very precariously balanced).
Tissi is known for its beautiful sunrises and sunsets as it is perched on the edge of cliff. We woke to a sunrise with clouds above and below us and mountain tips peaking out. Only 5 people came out to see it but it is well worth getting up early for.

Tissi was also the only Rifugio with a swing, teeter-totter and a heart outline for Instagram-style photo shoots. A fun addition you don’t expect on a cliff.
We would recommend going to this rifugio but be aware that there really aren’t enough facilities when full, so expect lineups.
Rifugio Carestiato

The dorm rooms held 4 to 5 people. We were in the only room on the third floor and it had the most space with one bunk and 2 single beds. We were first in and chose the two singles under the sloping roof even though we could tell right off the bat it was going to be a problem.
Laynni jumped out to an early lead but I eventually (and predictably) roared back to take the victory, 5 staggering head bumps to 2.

There are 2 bathrooms for the dorms that both had a shower in them. The hot shower was €2 for 2 minutes and you could pay for as many minutes as you wanted. There are another 2 toilets by dining room.
They lit a fire in the dining room so it was warm and cozy after a day of walking in the rain. There are outlets in the dining room and in some of the dorm rooms, along with good wifi and a little bit of cell service.
Where to Stay in Cortina D’Ampezzo
We spent 7 nights at the excellent Hotel Al Larin (3 nights prior to the trek, 4 nights after) and can highly recommend it. It is about 2 km out of town – an easy walk along a nice path or a short bus ride. Other than being out of town, though, it’s perfect – comfortable, friendly, balcony views, outstanding wifi and a terrific breakfast. A great choice.

Hotel Montana is a terrific budget option right in the heart of Cortina. It is basic but has all the usual amenities and the price is unusually low for the normally expensive Cortina. Unfortunately, some times of year it has a 7-night minimum.
Hotel Fiames is a good value choice with free parking and nice common areas including a garden, terrace and lounge.
Meanwhile, Franceschi Park is a beautiful choice just outside town with fantastic views, luxurious amenities and a popular breakfast.
Where to Stay in Dobbiaco
Hotel Kirchenwirt is just a kilometre outside of town and features great views, a buffet breakfast and an indoor pool.
And if you want to be closer to the start of the hike without breaking the bank, Gasthof Huber is a good value choice on the road to Lago di Braies. It is particularly known for its amazing food.
Finally, the ultimate place to stay the night before starting your hike is the iconic Hotel Lago di Braies itself, located right on the lake with unbelievable views and luxurious accommodations.
Food and Drink
Food on the Alta Via is usually very good (and often excellent), with every rifugio offering a full complement of meals. This means you don’t have to carry much food of your own, which is good, because there are virtually no shops along the way to stock up on your own supplies.
When staying in the rifugios you need to decide if you want just a bed, bed & breakfast or half-board (room, breakfast and dinner). In most cases the total price is going to end up pretty similar, although Laynni sometimes found the full meal to be too much so was just fine ordering an €8-12 starter instead.
We spent a fair amount of time trying to find details about food on the Alta Via 1 without much success. Since the Alta Via 1, unlike the Tour du Mont Blanc, doesn’t go through any villages, you are at the mercy of what the rifugios offer for food unless you want to pack a lot of extra food for the entire hike.
We were especially interested in the water situation at each rifugio, if breakfasts had protein and if the packed lunches would be big enough.
While we can only talk about the rifugios we stayed at, the general rule of thumb was that so long as you like sandwiches and pasta you will have plenty of food. Most of the rifugios served hearty breakfasts, with a few exceptions.
There were vegetarian options for each meal but it would be difficult to be vegan as eggs and cheese featured heavily as the protein substitutes. And the choices would be very sparse for anyone who needs to be gluten-free at lunch time although there was usually a soup option if you made it to a rifugio.
Water on the Alta Via 1, unfortunately, is a constant problem. In comparison with some other treks in the Alps such as the Tour du Mont Blanc where water is plentiful, the porous limestone of the Alta Via 1 Dolomites means fresh water can be hard to come by.
You’ll pass the occasional stream with water that could be filtered and/or treated but not many that you can count on, and there are often cattle around so we never trusted the water enough to try it.
A couple of huts have drinkable tap water but most don’t and only offer expensive bottled water – at €2-4 per litre, not ideal for the environment or the wallet. We once again found it very disappointing that places aren’t willing to sell bottle refills instead of running through hundreds of plastic bottles every day.
Most of the time we bought a bottle or two and then just treated tap water with AquaTabs. They worked fine for us but you can make your own decision.
For a complete hut by hut breakdown, check out our Alta Via 1 Food and Drink Guide.
Camping
Officially, camping is not allowed in the Alta Via Dolomites. However, this is somewhat strangely defined as staying in the same site for 48 hours or more so as long as you just stay overnight (called an “overnight bivouac”) you should be fine.
We did not camp so I can’t speak to personal experience but the campers we met were just careful to pick an unobtrusive spot and “leave no trace” and none of them had any issues.
The big advantage of camping, of course, is that you don’t have to reserve places in the huts ahead of time. Plus, you’ll save a lot of money. On the other hand, you will have to carry a lot more gear. But if you are the sort of person that is considering free camping the Alta Via 1 then I’m sure you are already well aware of all the pros and cons, so I’ll leave it at that.

How to Get to the Alta Via 1 from Venice
Gorgeous Venice is the closest big city and most convenient landing spot for most international visitors to the Alta Via 1. For checking out flights we usually find that SkyScanner is the fastest and most accurate site.
Most people then visit the Dolomites by car, either their own or a rental. With so many great towns and villages in the area we highly recommend renting a car for at least a few days to cover more ground and set your own schedule. Discover Cars usually have the best deals in the area.
Check out Where to Stay in Venice: A Guide to all 6 Neighbourhoods.
Another option is to take a full-day Dolomites tour out of Venice. These tours generally hit several of the top highights and provide all the transportation and logistics.
However, if you are going to hike the Alta Via 1 you might want to save the car rental or guided tour for after you’re finished the trek. In that case, you are probably looking for public transportation. The Cortina Express leaves from just outside the airport 4 times per day. It costs €20 and gets you to the posh ski resort town of Cortina D’Ampezzo in roughly 2 hours.
Then, whether you choose to spend a night or two in Cortina or continue on, at some point you will take SAD bus #445 to Dobbiaco (1 hr / €5) – the morning routes leave Cortina at 8 am and 10 am.
Another option is to take the train to either Dobbiaco or Villabassa, then take the bus from either of those.
Getting to Lago di Braies
From either Dobbiaco (Autostazione Dobbiaco) or Villabassa it will take 20-30 minutes on one of the Dolomiti buses that run to the lake hourly in summer (30 min / €5).
From Dobbiaco it is bus #448 but, for some reason, when we arrived in Dobbiaco the ticket booth was closed (despite the fact were well within the clearly posted open hours), the guy working at the “bus station” (i.e. small wooden shed) couldn’t sell us a ticket and we weren’t allowed to buy them on the bus (unlike every other bus we rode in the Dolomites).
That left 2 options: purchase a ticket online or walk about 5 blocks to the tourist office (and have to take the next bus instead). Needless to say, I would recommend buying the tickets online in advance to avoid any of this nonsense.
Getting Away from La Pissa
Dolomiti buses from Agordo to Belluno pass the La Pissa stop at regular intervals but they are more frequent on weekdays. You can check the schedule here and the rifugios near the end of the route usually have the latest times posted. It is about a 20-minute ride to Belluno where there are regular trains and buses to many destinations, including Venice.
If you need to get back to Cortina or Dobbiaco your best bet will probably be the train to Calalzo-Pieve Cadore (€5). From there, bus #30 (€4) runs on to Cortina on the half-hours.
Weather
This is mountain hiking so you need to be prepared for anything at any time of year (i.e snowstorms in summer). In general, though, July and August will feature hot days and cool nights, with a risk of thunderstorms in the afternoon. September tends to be cooler during the day, perfect for hiking, but gets cold at night (perfect for cozying up next to the rifugio fireplace).

We started our trek on September 9 and got near perfect weather every morning until Day 8 when it rained all day.

We did notice the clouds rolling in earlier every day, though. Our first day it was beautiful and sunny until around 4 pm, while by the end it was getting fairly cloudy before noon. It rained in the later afternoons a couple times too after we had already arrived at the rifugios. Nights were cold but nice enough in the rifugios, and the beer was always the same temperature whatever it was like outside.
Trip Planning Resources
Here is a list of the most important resources we use when planning our travels, all in one convenient spot. Full disclosure, when you use any of these links to reserve or sign up for something, we receive a small commission which is greatly appreciated. However, your price does not change and we have only included products and websites that we can honestly recommend.
- We book the majority of our hotels on Booking.com. With frequent stay discounts, thousands of reviews and free cancellation, it is very rare for us to have a bad hotel experience these days.
- Wise is by far the best international multicurrency bank account we’ve found. We can now send and receive money in half a dozen different currencies, convert to dozens more with no exchange premium and pay or withdraw local currencies. Highly recommended.
- When travelling we always get SIM cards with data for our phones. Local SIM cards are sometimes a bit cheaper but if you have a relatively new smartphone (iPhone XR or newer, Samsung S20 or newer) you can just buy an eSIM online, get a QR code by email and you’re good to go. After extensive research we have found that Nomad eSIMs usually have the best coverage and prices.
- Google is currently transitioning to an AI-only model and are now actively suppressing private websites. In most cases, they don’t even share attribution links to show where they got their information. Legal theft, apparently, which is terrible for travel blogs, as well as people who actually use travel blogs for trip research (i.e. us) rather than just hoping the latest AI mashup is somewhat accurate. Anyway, the point is, if you still want to read firsthand travel information, we recommend using DuckDuckGo as your search engine. You might even find some delightful Routinely Nomadic posts ranking high in those results.
- If you’re interested in local guided tours, including everything from city tours to cooking lessons to adventure activities, check out the huge range of options at Get Your Guide.
Packing
There are a few different packing strategies depending on the season, your itinerary and if you are staying in some dorms or exclusively in private rooms. And campers will obviously have to carry a lot of stuff people staying in rifugios won’t have to worry about. Although some rifugios told us we needed to bring a full sleeping bag, I took my chances and went with just a sleep sack to save weight and space and never had a problem. Every rifugio we stayed in provided blankets (although I did have to ask in Rifugio Venezia).
Make sure you bring hut shoes, a pack towel and if you plan to thoroughly explore the Lagazuoi tunnels, a head lamp will come in handy.
Comparable Treks
Besides the Tour du Mont Blanc, the Walker’s Haute Route shares part of the same route as the TMB but after they diverge it includes more high passes and the rough trails, making it more difficult than either the TMB or Alta Via 1. However, it is insanely scenic and features possibly the best mountain hut in Switzerland.

Another outstanding European trek similar to the Alta Via 1 in both beauty and difficulty is the fantastic Carros de Foc in the Pyrenees of northern Spain. Easily reached just a few hours from Barcelona, this terrific trek can be done in around a week and features outstanding scenery, basic but well-equipped huts and smaller crowds than some of the big treks in the Alps.

You can also check out our list of the best long-distance hikes in Europe.
Hiking in Nepal, on the other hand, is generally more difficult mainly due to the much higher altitudes. The terrain in the Everest Region or on the Annapurna Circuit is typically not as rough as the Alta Via but the Italian trek reaches a maximum height of just under 2,800 metres while on Everest Base Camp hike most people spend half their trek at 4,000 metres or higher.
Which means it is colder, harder to breathe and every hill seem just that much more difficult.

Meanwhile, the Rota Vicentina in southern Portugal is an exceptional option because, unlike hikes in the Alps, it can be done all year-round, plus it is a coastal hike that offers no altitude problems and relatively little elevation change. There is the added difficulty of hiking on soft, sandy trails much of the time but, overall, it is a much easier trek than any of the first three.

You can also check out the details on many of the other multi-day treks we’ve done around the world if the whole long-distance hike concept is starting to grow on you.
Summary

Despite its challenges and difficulty level, the Alta Via 1 is definitely one of the most scenic treks we’ve ever done. The stunning mountains are so uniquely jagged, sharp and random, it offers up very unique views around every corner. While the Tour du Mont Blanc is comparable in many ways, one big difference is the fact that on the TMB you spend the entire trek circling the same mountain range. An undoubtedly incredible one, and you get to see it from all different angles, but the Alta Via is fascinating in the way you pass through a multitude of different ranges and terrain every day.
The bottom line is that if you are up for the challenge, the Alta Via 1 is an amazing trek that every avid hiker should try at some point. It is certainly one of the top hikes in Europe and the comfortable rifugios mean you don’t have to sacrifice (much) comfort.
Pin it for later!
Other posts you might like:
The Best Things to Do on the Amalfi Coast
Manaslu Circuit: Everything to Know Before Your Trek
Huayhuash Trek FAQ: Burning Questions
About the Author
Dean Johnston

Dean Johnston quit his job as a financial planner in 2008 to travel the world, and has now visited all 7 continents and more than 85 different countries. He wrote his first blog entry in a sweltering internet cafe in Bali in 2000 and has been writing about their travels ever since, including publishing 3 travel books.
As Routinely Nomadic, Dean remains focused on providing informative travel guides, entertaining stories and useful social media content to readers from all over the world.
Loved your break down of the route. It was incredibly helpful. I was wondering if you could help me with the Tre Cime add on that you did. My wife and I are interested in doing the same. We plan to do the Alta Via 1 this summer in late June. How far is it from Rif. Locatelli to Rif Prato Piazza? Also how far from Rif Prato Piazza to Lago di Braies? How did you discover this connection? Do you have any resources that you would recommend that would help us map this out? I would like to do the adder, trying to figure out how long and how much time we will need to pull it off. We may hike right to Rif Biella from Rif Prato Piazza. Not sure, thinking through options. Thanks in advance for your help. It looked like an amazing trip.
Glad you liked it – the hike is incredible, you’ll love it! Anyway, we didn’t actually do that route, we hiked Tre Cime as a day hike before the Alta Via. But some friends we met along the way told us about it. It is part of the Alta Via 3 I believe – I found some conflicting info on it but based on what they told us I’d believe the longer estimates. Probably 15km / 6-7 hrs from Locatelli to Prato Piazza and 13km / 5-6 hrs to Biella. They even managed to make it down to Lago di Braies and back up to Biella that second day so I don’t think it was any farther than that. I’ll email you a couple of links I found.
Does anyone know if there is a storage place either on the N or S side of the Alta Via 1 to store gear not used on the trail? I have been searching and haven’t been able to come up with anything. Thanks.
We weren’t able to find any specific luggage storage facilities although we didn’t look very hard in Belluno since we didn’t plan to spend a night there. However, we were able to leave a bag at Hotel Al Larin in Cortina. Since we were staying a few nights both before and after the trek they were fine with holding it for us.
Hi Dean,
Thanks for your great breakdown of the route!
We are planning on doing part of the route in late June, but going South-North.
We will be staying at Pramperet (29) then Vazzoler (24) and then finishing at Venezia (18) – Do you think this is manageable/ recommended? We are all relatively fit, but are not sure about the level of signposting/ climbing that will need to be done on each day.
Many thanks,
Connor
I think that route is possible if you’re fit. They will definitely be tough days but you’ll have a lot of daylight so you won’t have to rush, a few solid breaks go a long way. We did Venezia to Tissi without any problems and I was hobbling on a bum knee by then, so the extra couple hours from Vazzoler should be no problem. We didn’t make it all the way to Pramperet but I do know that from there to the road is a common leg, although obviously more difficult going up. Without knowing your hiking abilities I can’t say for sure, but there is nothing surprisingly hard about those routes so if the distances and times look reasonable to you it should be fine, just get an early start and take your time. Have fun!
Hi! Thank you for your great write-up on this trail. I was wondering if you could provide some more details for your Stage 4: Rifugio Lagazuoi to Rifugio Averau. You decided not to take the standard route pass Rif Diobona, and cut down after Col dei bos. I assume this was on trail # 402? Is that correct? Could you let me know which trails you decided to take after 402 to get to Cinque Torri? I definitely want to avoid the “washout” you described, and there is a whole mess of trails and a couple of road crossings through there. We will be hiking from Rif Scotoni to Rif Scoiattoli that day rather than starting from Lagazoui (was already booked) so we’ll be having a longer day already. It seems cutting down onto 402 to 412 to 440 would be a way to cut out some extra mileage, but if it is really rough, we would want to avoid it. Any help or advice you have on that area would be most helpful!
I think what you’ve described would work fine, I just don’t remember the specific trail numbers any more. I’m pretty sure it was #402 we took most of the way down, then we got to a point where we were directly across from the Scoiatelli cable car (500m) but the main trails went either west or east then doubled back along the main road. So we decided to be clever and save ourselves a couple of kilometres by tackling the washout which, as we mentioned, was not a good idea. But I’m pretty sure following the road/trail in either direction was almost identical distance and about the same amount of time as it took us considering it would be easy walking. Then there is a fairly well-marked trail up to Cinque Torri or you can take the cable car like we did (since we had worn ourselves out). Bottom line: once you’re there the options all seem pretty obvious so I wouldn’t worry too much. Have a great hike!
Great read, thanks for all the info and motivation to go ahead and book this independently rather than through a tour company. I would love your input on the feasibility of finishing after and Rifugio Vazzler or San Sebasitiano. Looking at doing this hike July 2023 and yet to buy the guide book but its on order! thanks
From Vazzoler you should be able to hike down to the highway, Listolade I think. Sebastiano would work for sure because it is right on the road. You’d have to check with them for the latest bus schedules, though, since I don’t think they are as frequent as those on the main highway. Either way should be manageable though if you want to shorten the trek. Good luck!
hi, My husband and I have 6 days to hike and will just do part of the Alta via 1 route. we thought we would start at Lake Braies though as that area looks so beautiful and then just take 6 days. Day 6 is usually from Refugio Cittta di Fiume or rifugio Staulanza to rifugio Coldai or Rifugio Tissi but is there exit point from Rifugio Coldai or Tissi? ie could we arrange to be picked up by a car from Rifugio Coldai or Tissi, is it near a road? Or would we have to exit at Passo Staulanza and could we get picked up from Rifugio Passo Staulanza? We are trying to organize a transfer either straight to Lake Garda that day or back to Cortina d’Ampezzo. (there is a car service that also stores your luggage from Cortina D’Ampezzo so we could potentially have them pick us up from somewhere like Passo Stualanza or near Rifugio Coldai/Tissi with our luggage and take us straight to lake Garda.
you talk about the two routes to choose from out of Averau (or Nuvolau). If we were interested in doing the one that tackles the via ferrata over the cliff behind Rifugio Nuvolau is it possible to hire equipment or a guide from Rifugio Nuvolau? do people clip in on this via ferrata?
Yes, that is the section we would recommend also. There is no road to Rifugio Tissi but Rifugio Coldai is only a couple hours of hiking up from a main road and ski resort (Palafavera) so that would work. Passo Staulanza is just a bit before that on the same road so would obviously work as well but if you can make it to Coldai, the location is spectacular.
As for the via ferrata, yes, most people clipped in and we got some pretty skeptical looks coming down without any gear and our backpacks on. Probably not our smartest decision but we’re still here, so… I do not think you can get equipment or guides from Nuvolau or Averau but you’d have no problem finding a place in Cortina. You might be able to arrange for them leave it at Passo Falzarego or one of the huts for you.
Let us know if you have any more questions, and have a great trek!
thanks so much, I think we are now just going to do a 5 day trek as my husband wants to spend more time in other parts of Italy as well. So we will end at Rifugio Stualanza for the night and get a bus or pick up out of there the next morning. Will we be missing out terribly if we don’t make it to Coldai? Who knows maybe one day we will go back and do the southern part of the Alta Via 1. My husband and I probably could have done more hiking each day and got a bit further in 5 days but we don’t want to overly push ourselves and not have time to enjoy it and our last day from Averau over the ferrata Ra Gusela (is that the one you did)? to Staulanza will be a long day (I think about 6-7 hours).
I may have a taxi company that will bring our luggage from Cortina d’Ampezzo to us at Rifugio Staulanza and then drop us at Belluno to pick up a car rental, that we will then drive that same day to Limone Sul gard at Lake Garda. We could go all the way back to Cortina D’Ampezzo but that will add extra driving time for us down to Lake Garda etc.
So the plan is to get the bus to Venice and then perhaps instead of staying in Cortina d’Ampezzo we were thinking of staying in Dobbiacco the night before we start the trek. So we found a taxi company that would pick us up at the bus station in Cortina d’Ampezzo, drive us up to Dobbiacco and then keep our luggage for the 5/6 days and then pick us up from Rifugio Stualanza with our luggage and take us to Belluno, its not cheap but it is not outrageous. Of course we could avoid all that if we spend the night in Cortina D’ampezzo and then get the bus or ride back to Cortina d’Ampezzo from R. Staulanza but that would add about an hour to our drive time to Lake Garda and also I heard the accommodation in Cortina d’Ampezzo is very expensive and then we would have a later start to our hike the next day (we are planning on staying at Rifugio Sennes the first night so its not a long first day anyway).
However, I am interested to know what you would recommend: should we stay in Cortina d’Ampezzo the night or Dobbaccio? will we be missing out if we don’t stay in Ciortina d’Ampezzo the night? My husband does like looking round little towns or villages. Do you have places that you would recommend to stay in either of those two places that aren’t too expensive?
And by the way I think we have found a company that would send a guide to meet us at Rifugio Averau with the equipment and take us over the ferrata Ra Gusela down towards the passo Giau and then we can hand the equipment back to him and carrying on our trek to R. Staulanza etc. If it all works out I will send you the details so you have for other. They are sayin EUR 165 pp.
Thanks so much
Justine Rudman
hi,
I already got some of my questions about above answered but if you care to weigh in please do.
how many liters of water a day did you carry? Did you have a 2L camel back and then an additional 2 liter bottle? less than that? I typically don’t drink all my 2L when I am hiking on long treks. We are doing the traditional 5 day route stopping in the usually rifugios (not skipping stages) so not too many long days, We have the trelling the dolomites AV1 book and have been told we don’t need to get any additional tobacco maps but if we do which Tobacco maps should I get if we are stopping at Rifugio Staulanza and not doing the last part of trek?
Thanks
Justine Rudman
Thanks to you for providing all of this very helpful information!
My wife and I will be on AV1 in late July but, unfortunately, we won’t have an adequate amount of time to hike the entirety of it and still call it a vacation. We’ll have a total of six days in the Dolomites, and we’re trying to balance our (not always shared) interests in trekking, via ferrata, trail running, water color painting, and taking in the geology and history of the place. So we’re thinking we won’t want to take on more than about 50-60% of the entire distance.
Looking back on your trip, and considering what we’re trying to accomplish, what 40-ish mile length of the AV1 do you consider to be the most rewarding? And would access logistics (cable cars/road crossings/transit) be reasonable for starting and ending the trek at those spots? Thanks in advance for any feedback you can provide.
Glad we could help! There aren’t really any weak sections on the AV1 but in my opinion the best stretch started the day we hiked to Rifugio Lagazuoi. So I would start either at Scotoni or Fanes (both accessible by road – might need a private taxi, not sure) and do 5 or so sections from there. If you want to come through the spectacular Forcella del Lago (stunning but steep) you need to come from Fanes/Lavarella. If you come from Scotoni it is easier and you’ll still get to the lake but won’t cross the pass.
Then your other decision will be if you want to cross another very steep pass to Rifugio Venezia or just continue around the mountain to Coldai or Tissi. Then it is easy to get back out from Carestiato / Sebastiano / Passo Duran C Tome.
Hope this helps, let us know if you have any other questions.
Hello. Fellow Canadian here (Cranbrook, BC). I really enjoyed reading your wonderful information about AV1. Four of us are doing it at the start of Sept 2023. We did TMB about 4 years ago and are so excited to be going back to Europe to hike more. I’ve been doing all the planning, since Fall 2022, so things are pretty well in order. My one question is about leaving the AV1 after a night at Rif Vassoler. Looks to me like we’d need to hike to Bruto Carestiato, have lunch, then descend until we reach Agordo (where we have an Airbnb booked). Looks like it will be lots of just downhill hiking to a road near a place called Pecole, which is a base for many other hikes. Sometimes Googe Maps indicates that we’ll need to hike over to Rif San Sebastiano before we can begin our exit. Do you have any ideas on that? Thanks in advance. Dean
Glad we could help! It sounds like you’ve got it about right based on what we saw and should not have to continue to Sebastiano. I didn’t remember the name of the village we reached on our way down but it was probably Pecole – from there you can follow the road (quiet, longer and more gradual, chose that for my knee) or take a dirt path through the trees (shorter, steeper, more scenic). Pretty sure you can find this route on AllTrails.
It is possible that there is a trail down from Vazzoler to Cencineghe Agordino but if there is it would be extremely steep and I can’t help you out with any more than that. Hope this helps, have a great hike and let us know if you have any other questions!
about to do the trek this June.
Your blog has been the most help of any i’ve found.
Doing 8 days pretty much as you described – few changes as some rifugio’s already booked out 5 months ahead.
Not sure i’ll go carastiato to pian de fontana day 7 and onto la pissa day 8 – knees and big descent also a concern- maybe out Forno di zoldo on day 7
cheers
jamie
Glad it’s been helpful – it would be nice if the rifugios didn’t have to be booked so far in advance but at least you can still adjust on the fly if needed (at the cost of a couple of deposits). Hope you have great weather, and let us know if you have any questions we might be able to help with!
we are interested in the av1 for 2025 summer. would appreciate if u can contact us for details.
Sure, we’d be happy to answer any questions you might have. What are you wondering about?